Mass Notifications
To send messages to self-service, staff-assisted, or both groups of employers, use the Mass Notifications tool. This feature enables a staff member to send one message or repeating messages to the desired employer group.
Navigation
-
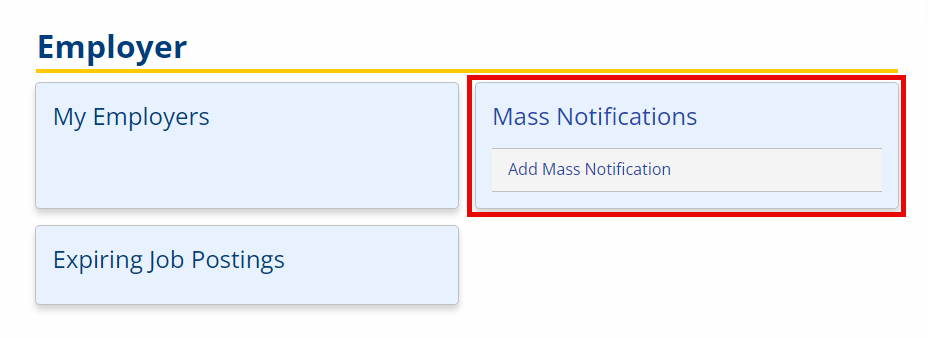
In the left-hand navigation menu, click Employer. The Employer page displays.
-
Select the Mass Notifications tile.
View/Edit/Delete Mass Notifications
- Navigate to Mass Notifications. The Mass Notifications page displays.

- Click the Edit button in the Actions column for the notification you want to view or edit. The Mass Notifications Details page displays.
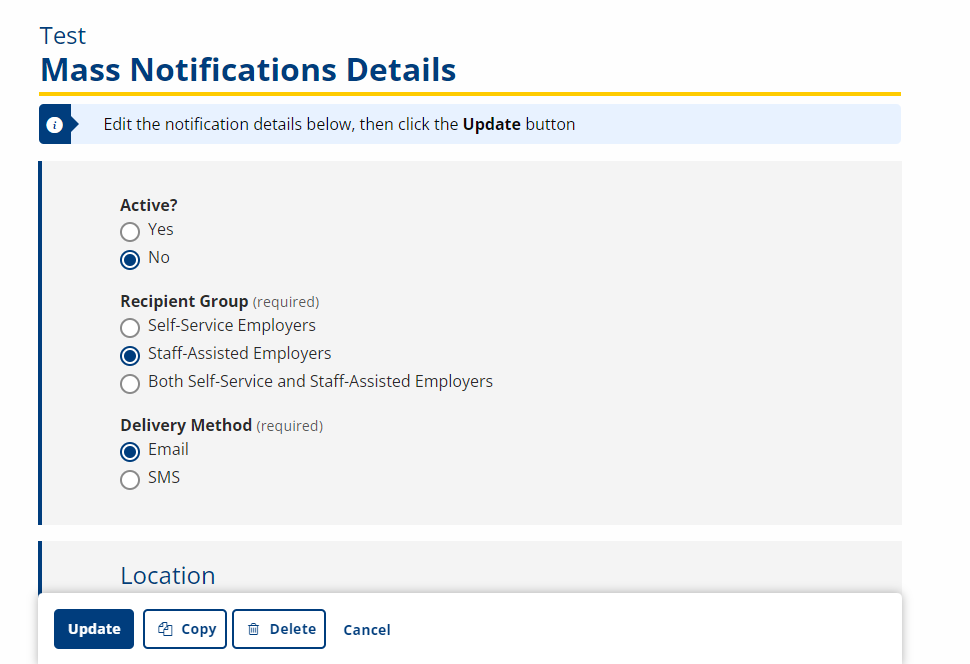
- Edit any of the information and click Update.
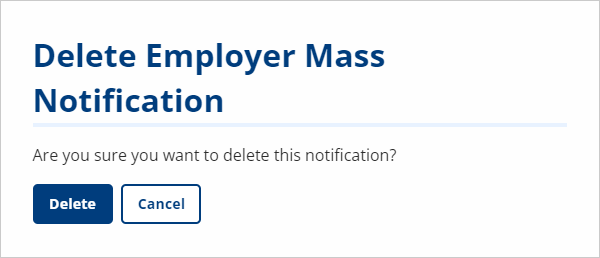
- To delete the notification, click Delete. A confirmation page displays. Click Delete to continue.
- To copy the attributes of this notification to a new notification, click Copy. A new notification form displays with all options populated.
- To return to the list of Mass Notifications, click Cancel.
Add Mass Notification
- Navigate to Mass Notifications. The Mass Notifications page displays.
- Click Add Mass Notification. The Add Mass Notification page displays.

- Active? Option; Select Yes or No.
- Recipient Group: Option; Select the recipients for the notification from the following:
- Self-Service Employers
- Staff-Assisted Employers
- Both Self-Service and Staff-Assisted Employers
- Delivery Method: Option; Select the method of delivery for the notification from the following:
- SMS
- Location
- Employer Zip: Text; If Self-Service Employers or Both Self-Service and Staff-Assisted Employers is selected as the Recipient Group, type the ZIP of the region to receive the notification.
- Radius: Drop-down; If Self-Service Employers or Both Self-Service and Staff-Assisted Employers is selected as the Recipient Group, select the radius within the region to include in the notification.
- Office: Drop-down; If Staff-Assisted Employers or Both Self-Service and Staff-Assisted Employers is selected as the Recipient Group, select the office within the region to receive the notification.
- Job Postings
- Job Status: Option; To limit the recipients to employers with job postings in a specific status, select the status (Active, Inactive) or select Both to send to employers with either active and inactive job postings.
- Job Posting Updated in Last: Option; To limit the recipients to employers with job postings updated within a certain range, select the range (Day, Week, Month, Quarter).
- Disclosure Level: Check boxes; To limit the recipients to employers with job postings with a specific disclosure level, select one or more options (Public, Public Limited, Private).
- Message
- Subject: Text; Type the subject line of the message.
- Message: Text; Type the body of the notification text.
- Message Frequency
- Next Run On: Text/Calendar; Select the date for the notification to be sent. Defaults to the current date.
- Should Send Count: Text; Type the number of times for the notification to be sent. This is how many times the notification should be repeated, not how many recipients will receive it.
- Sent Count: Display; Shows the number of times the message has already been sent, if applicable.
- Last Run On: Display; Shows the last date for the message to be sent, according to the number of times entered.
- Completed?: Display; Indicates if the send process has completed.
- Click Submit.